A printer template is used to define a printer page and the images that will be printed on that page.
Every printer template needs a printer page size and at least one image to be placed on that page.

The printer template utility allows you to define both the printer page size and the size, orientation and location of all the images that will be printed on that page.

The first dialogue that is shown after you click the edit printer templates button will allow you to see the existing templates in the system. Selecting a template in the list box will create a preview in the display area, the numbers of the image number that defines the location, and size of the images to be printed. In this example we are going to print to two images on a 4x6 piece of printer paper. If we click edit the following dialog will appear:

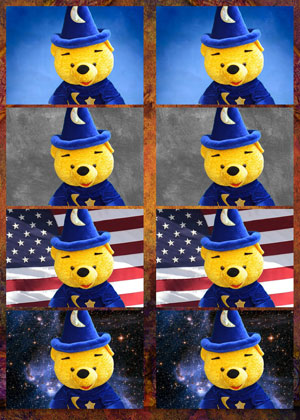
Here is an example of a printed page with a background image:

This dialogue allows you to name the template and define the size of printer paper. It does not automatically add any images to the template. Like other parts of the system you may decide to enter your sizes in inches or centimeters. A new feature for the Photo Booth is that you can add a background image to the printed page. You can use all the text and image options of Green Screen Wizard to create these backgrounds
Once you've named your template you are now ready to add images to the template. Clicking add/edit template images will bring up the following dialog:

As you recall from the initial dialog this example has 6 images. You can tell which images we're looking at by the numbers on each image. You can either add a new image or edit an existing image with the buttons on the right. If you click "Edit" or "Add" the following printer template image location dialog will appear:

This dialogue will let you specify the height and width of the image to be placed on the printed page. The location of the image is defined by the image's left hand upper corner. The coordinates on the printer page start with 0,0 as the upper left-hand corner of printer paper. A new feature, the Photo Booth image number, will tell which image in the photo sequence to use for this slot. For example the images on the right will get numbers 0,1,2 and the images on the left will get numbers 0,1,2. This will tell the system that a total of three images is required to fill this template. Do not confuse this number with the image # for editing
