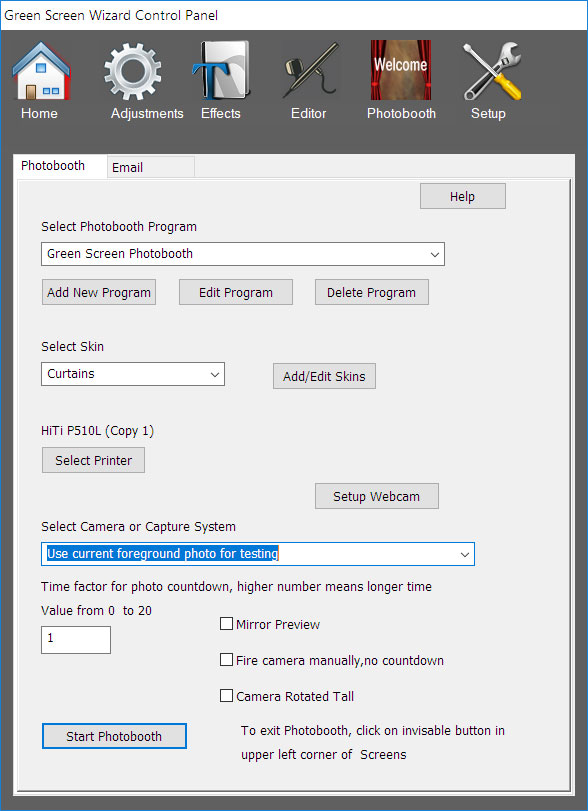
Photo Booth Main Screen
Why would you need to program a Photo Booth? The answer is that this software is designed to smoothly meet the needs of the situation.
For example if you are running in a museum and want to offer the system for free you may not want to pay for printing the photos and only allow email or texts.
At a trade show you want the uses to go through the booth quickly so you give them lower resolution photos and do not give them background choices or let then review the output.
In a realtors office you would want very high quality output and a selection of backgrounds.
If you are selling photos at a fair you would want to give the user choices of overlays.
Concepts
There are 5 important concepts to need to understand to create the Photo Booth experience:
The Output Printer Template Determines:
o The dimensions, (default 5x7) of the output to be printed or saved
o The location, size and numbe of images in the output file
o The number of photos the booth with take
o An optional background image
Click here to learn more about Printer Templates
The Image Definition Determines:
o Image Size of photos taken
o Selects Output Template
o Selects if green screening should take place
o Decides if background is pre selected of if the user is given a choice
o Optionally selects a overlay image
o Assigns an icon to be used for the opening screen
Click here to learn more about Image Definitions Files
The Opening Screen Layout Determines:
o The selection and placement of defined Image Definitions
o The Text on the opening screen
Click here to learn more about the Opening Page
The Program File Determines:
o What output choices are shown on the Output Choice Screen
o What screens are shown and for how long
o What Opening Screen Layout is used
More Details Below
The Skin File Determines:
o The color and location of text for the opening screen.
o The color of text for messages.
o The location of the Image Definition Icons on the opening screen
o The folder that contains the skin image files
Click here to learn more about creating Skins
Programming the Photobooth
On the main screen, clicking delete will delete a program, clicking add or edit will bring up the following dialog:
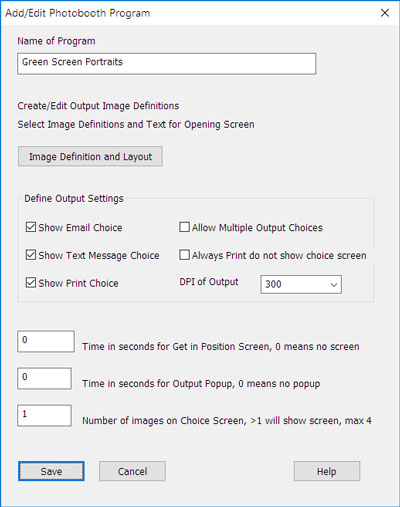 Name of the program
If this is a new program or you wish to make a copy of the current enter a new name in the name field.
Image Definition and Layout
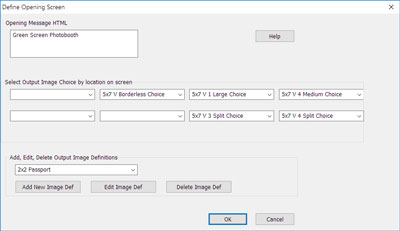 Pressing the Image Definition button will bring up a dialog box that will let you layout the Opening Screen and define new Image Definitions.
For details on how to use this dialog Click here.... Printing and Saving Options
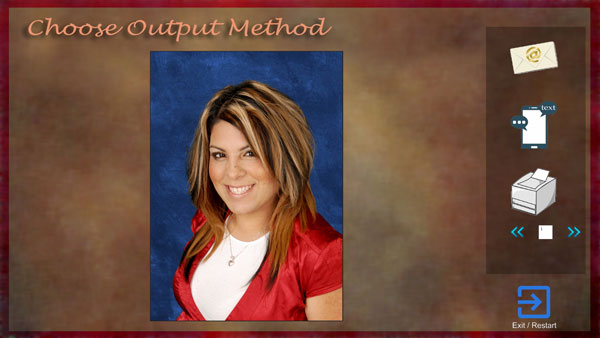 The output choices are:
o Email
o Text Message
o Printing
You can select any combination of the three. If you select none of them the Output Choice screen will not be shown.
You can choose to always print even if the screen is not shown. You may also use the Image Sharing System (See Green Screen Wizard Website) to let the user choose his output method on a iPhone/iPad running the Photo Sharing App.
Normaly once the user has selected an output the system will show the Thankyou Screen and then go back to the opening screen. If you would like to let the user select multiple outputs you can check that option.
Selecting Optional Pages
The final two edit boxes let you select time for option pages to be shown. The final box will let you shoot multiple image for a single image output. This is a nice feature for portrait systems.